

Users of Windows 10 who have just updated to Windows 11 are experiencing several troubles. As the desire for working from home grows, workers must now cooperate from various locations, nations, and even time zones. Working remotely, on the other hand, need a strong internet connection and a powerful PC that allows you to effortlessly access your remote office system. After installing the latest patch, some customers have reported that their Windows 11 WiFi continues disconnecting. Even when the network is within range, WiFi continues to disconnect and refuses to rejoin. If you are experiencing the same problem and your Windows 11 WiFi keeps disconnecting, use this tutorial to resolve the WiFi disconnecting issue on your Windows.
Turn on/off Airplane Mode
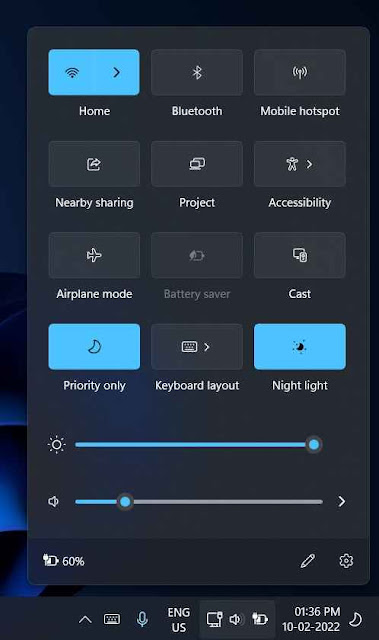
If your WiFi keeps disconnecting on Windows 11, the simple answer is to toggle Airplane mode on and off again. All radio devices, including WiFi, Bluetooth, and others, will be deactivated and then reactivated. The steps are as follows:
- To begin, click on the taskbar in the lower right side of the screen.
- Tap the Airplane mode button here. This will turn off the Wi-Fi service.

Then turn it off to see if the WiFi still disconnects.
Configure a Wi-Fi network as a private network.
If you set your home Wi-Fi network to Public, a separate set of firewall and network settings will be applied, perhaps causing the problem on your Windows 11 PC. Alter the network profile from public to private. So here are the steps you should take:
- To begin, go to the taskbar part where you normally input the network.
- Now, next to WiFi, click the arrow symbol.
- Then, right-click on the network to which you are unable to join and select Properties.

As the network profile type, select "Private." That's the end of it.

Start the Network Troubleshooter.
Run the Internet troubleshooter and allow Windows 11 to try to locate and resolve the Wi-Fi disconnection issue on your computer. The following are the measures to take:
- First, open Settings by pressing the Windows key once.
- Then choose System Preferences from the left sidebar.
- Select Other Troubleshooters from the System menu.

Then, in the "Internet Connections" section, press the "Run" button.

Reset Network Configuration
If nothing else has worked, a thorough network reset is required to restore all network configuration settings to their original form.
- First, open Settings by pressing the Windows key once.
- Then, from the left sidebar, navigate to the "Network and Internet" area and scroll down.

Select "Advanced Network Settings" from the drop-down menu.

Then select Reset. Now, when prompted to confirm, tap once more.

It will reinstall your network drivers and restore your internet settings to their original state. After that, restart your computer to see whether your Windows 11 WiFi is still disconnecting.
WiFi Power Management Preferences
To preserve battery power, Windows 11 occasionally puts several system services to sleep, including Wi-Fi and Bluetooth. If your WiFi in Windows 11 keeps disconnecting, it might be due to your power management settings. This will undoubtedly assist you in resolving the issue because it has occurred to many customers and they have reported that this way may resolve the issue. The following are the measures to take:
- To begin, hit the Windows key once and look for Device Manager.

- The network adapter option will be shown. Expand it, then double-click on the driver for the WiFi network.
- Select "Properties" from the context menu when you right-click on the Wi-Fi adaptor.

The properties window will now display. So, navigate to the Power Management section.
On this option, uncheck "Allow the computer to switch off this device to save power."

Restart your computer by clicking OK. Check to see whether the Wi-Fi shutting off issue in Windows 11 has been resolved.
Change your DNS settings.
Several customers claimed that their Wi-Fi was regularly dropping, however the problem was repaired shortly after updating the DNS. So, you may try it as well and see if it helps solve the problem of WiFi disconnecting on your Windows 11 PC. The steps are as follows:
- First, open Settings by pressing the Windows key once.
- Then, on the left sidebar, select Network & Internet.
- Then, select "Advanced Network Settings."

Then choose "More Network Adapter Options."

Select Properties from the menu that appears when you right-click on the active WiFi adapter.
Select "Internet Protocol Version 4 (TCP / IPv4)" on the "Network" tab in the Wi-Fi properties.
Then, on the General tab, check the box next to Use the following DNS server addresses.

Preferred DNS Server should be 8.8.8.8 and Alternate DNS Server should be 8.8.4.4. To save the changes, click OK.
Install the most recent Wi-Fi driver.
If none of the following solutions work, you'll need to upgrade your WiFi driver. An incompatible Wi-Fi adapter driver is the most prevalent source of the problem. That's all I've got.
To begin, hit the Windows key once and look for Device Manager.

The network adapter option will be shown. Expand it, then double-click on the driver for the WiFi network.
Select Update Driver Software from the context menu when you right-click on the Wi-Fi device.

The properties window will now display. Select "Automatically search for updated driver software."

